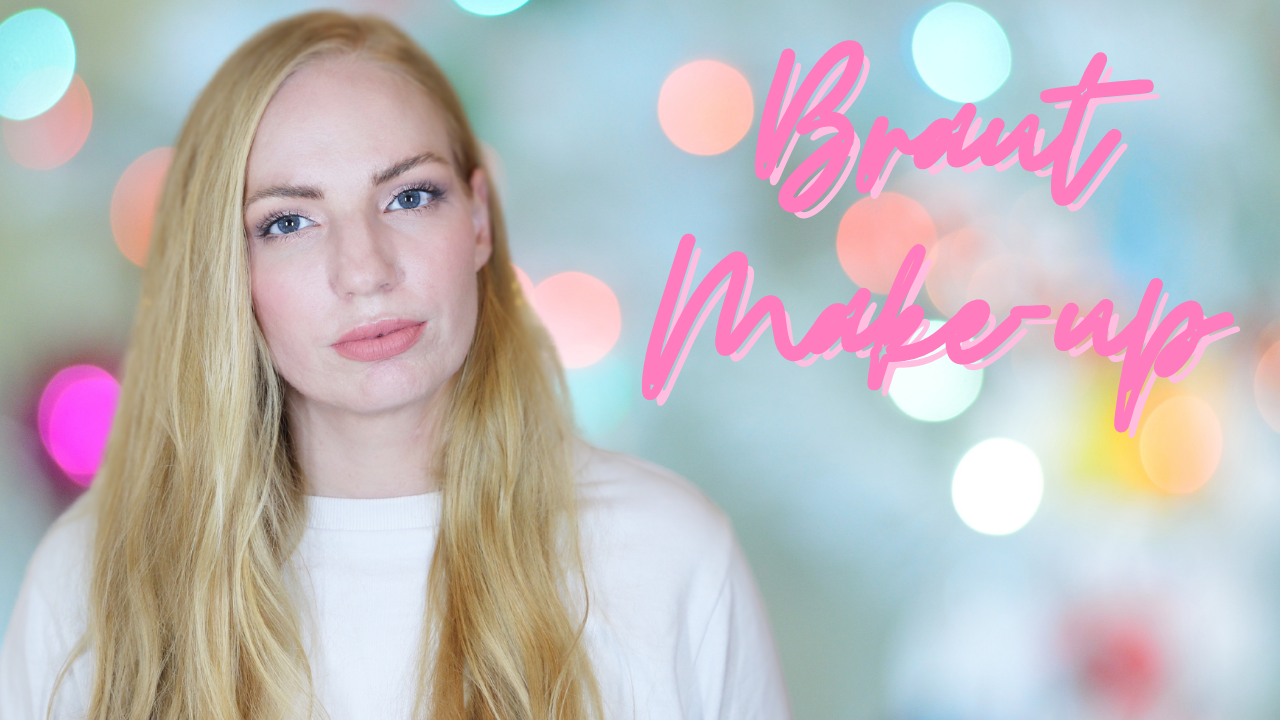
Of course I advice all brides to book a professional makeup artist for their wedding, but I guess I am biased! In a pandemic the whole wedding planning thing is not very easy, including hiring staff that may not be allowed to work on the day of. So today I am showing you a bridal makeup in pink with a lot of tipps, just in case you have to do your own makeup!
Video: Bridal Makeup in Pink
Unfortunately my videos are only available in German at the moment. If you want to practice your German, I have also added closed captions! You should still be able to follow along with the tutorial though.
Tutorial: Face
Step 1: Skin Prep
If you have been reading or watching me for a while, you know how important skin prep is for a good makeup application! I will not bore you with the details today. The English Versions of the following blog posts will be available soon!
Step 2: Underpainting
I like to start by shaping the skin under the foundation with Highlighter and Contour. This is called underpainting. The result is a lot more natural than using this technique on top of your foundation.
Highlighter is applied on the highest points of the face: eyebrow bone, cheek bone, bridge of the nose, Cupid’s bow, etc.
Contour is applied on all areas that you want to fall back a little. For example: under the cheek bones, side of the face, double chin, etc.
Where exactly everything is placed is very dependent on the individual face shape.
Products I like using for underpainting:
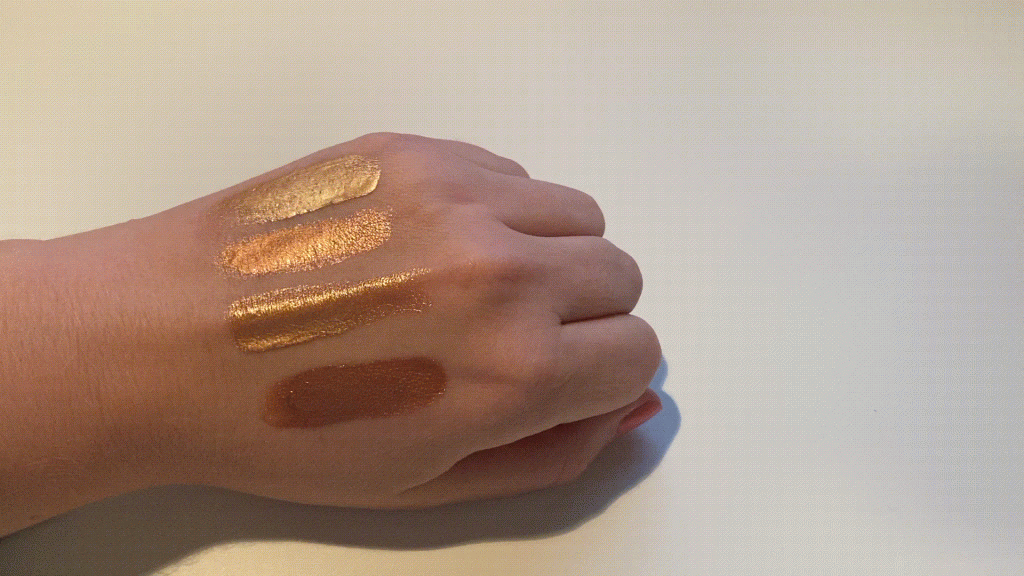
Fair Skin: Perla, Oyster
Medium Skin: Peach Fizz, Penny
Deep Skin: Bronzed, Rose Gold
- Danessa Myricks Illuminating Veil
- Charlotte Tilbury Hollywood Contour Wand
- Danesa Myricks Balm Contour
Bridal Makeup in Pink: Step 3: Foundation
Now we are applying the foundation. I use the Temptu Perfect Canvas 24-Hour Hydra Lock Foundation in my Air Compressor on about 90% of my brides. It has a semi-matte finish, is buildable and the most important factor on your wedding day: it lasts a really long time! You can also use it without an airbrush machine.
For brides with very dry skin I can recommend the Face Atelier Ultra Foundation or the Face Atelier Ultra Sheer Foundation, for a very sheer coverage.
If you really want something very light, you can always just mix your favorite foundation with a bit of moisturizer to create a BB Cream.
Step 4: Concealer and Corrector
After you have put down a thin base, you can do a little bit of spot concealing. That just means to cover smaller spots with concealer instead of over a large area in the face.
I use the correctors to neutralize colors like red and blue on the face.
My favorite concealers at the moment:
- MÁDARA The Concealer (under the eye)
- Danessa Myricks Vision Cream Cover (rest of the face)
Step 5: Cream Bronzer
The main purpose of bronzer is to warm up the face. The color of a bronzer is not the same as a contour color. Bronzer usually has a warm undertone and a contour color is supposed to mimic shadows, so it’s often a cool undertone.
I like applying bronzer in a 3-shape on the sides of the face and concentrate a little on the nose and neck as well.
My favorite Bronzers:
- Fenty Beauty Cheeks Out – Freestyle Cream Bronze
- Danessa Myricks Waterproof Cream Palette – Essentials
- MILK Matte Bronzer
Step 6: Cream Blush
Cream Blush really has endless good options. I like placing it a little further back on the cheek and blending it upwards, towards the temples. This elongates the face a little. However like with the contour, highlight and bronzer placement, this depends on the face shape.
A few nice pink cream blushes:
- MILK Lip & Cheek in Rose Poudré
- RCMA Series Favorites 5 Part Palette Cream blush (all colors except Coral Kiss)
- Danessa Myricks Vision Flush in Tutu and Black Cherry (for deeper skin tones)
Tutorial: Eyes
Step 7: Eyeshadow Primer
For a long lasting eye makeup, you need a good eyeshadow primer. Just blend it on your entire lid with your fingers or a brush.
Favorite Eyeshadow Primers:
Unfortunately I have not found a good, cruelty-free option for deeper skin tones yet, so I am still using the NARS Smudge Proof Tinted Eyeshadow Base Primer in Shade 3 or 4.
Step 8: Eyeshadow
A basic eye makeup look usually consists of 3-4 colors. For this bridal makeup pink you will need a light pink, a medium pink, a shimmer shade and something a little darker with a matching undertone (I used a cool brown).
You can start with the lightest shade and blend it in or above your crease and your outer V.
After that you can use the medium shade and place it in the same area, just a little further down and less blended.
Now place the shimmer shade on the movable lid.
You can concentrate the darkest shade on the outer V.
For a pink eyeshadow look I can really recommend the Viseart Rose EDIT Eyeshadow Palette.
I also like using cream and liquid shades on the eyes. For example Danessa Myricks Colorfix in Romance or Charlotte Tilbury Eyes to Mesmerise Cream Eyeshadow in Rose Gold.
Step 9: Eyeliner
For a natural bridal makeup in pink, I like using an eye pencil in between and under the lashes. This makes them look fuller.
The best black eye pencils:
In the waterline I like using nude pencils, to open up the eyes.
- Charlotte Tilbury Rock’n’Kohl in Eye Cheat
- NABLA Magic Pencil in Light Nude, Nude or Dark Nude
Step 10: Mascara
If you use eyelash curlers before mascara, the eyes will automatically look bigger and more awake.
You need to use a waterproof mascara (even if you think you’re not going to cry). Black is an all-time favorite, but if you are very fair you can also use brown if you like.
Bridal Makeup in Pink: Eyebrows
Step 11: Eyebrows
Usually I keep the eyebrows pretty natural in a bridal makeup look. Unless the bride wants something stronger of course!
I prime the eyebrows with a wax and comb them in the right direction. Afterwards I fill them in with an eyebrow pencil, draw a few hairs with an eyebrow powder and finish everything with an eyebrow gel.
- Anastasia Beverly Hills Brow Primer
- NYX Micro Brow Pencil
- Anastasia Beverly Hills Duo Brow Powder
- essence make me brow eyebrow gel mascara
Step 12: Powder
Depending on the skin type, I use less or more powder, but definitely under the eyes and in the T-Zone. I prefer doing this with a translucent powder unless I need a little more coverage.
Best translucent powder:
Step 13: Intensifying with powder products
Now you can make your makeup look more intensive by applying powder products if you want. I prefer using layers like this, because it extends the wearing power of the makeup.
Powder blush:
- Anastasia Beverly Hills Blush Trio in Pink Passion (fair – medium skin tones)
- Anastasia Beverly Hills Blush Trio in Berry Adore (medium – deep skin tones)
Powder bronzer:
Lips
Step 14: Lipstick
The lip makeup for a bride has to be kiss proof! That’s why I suggest to all my brides to use a liquid lipstick or a lip tint. Another option would be to apply lipstick after you have said yes.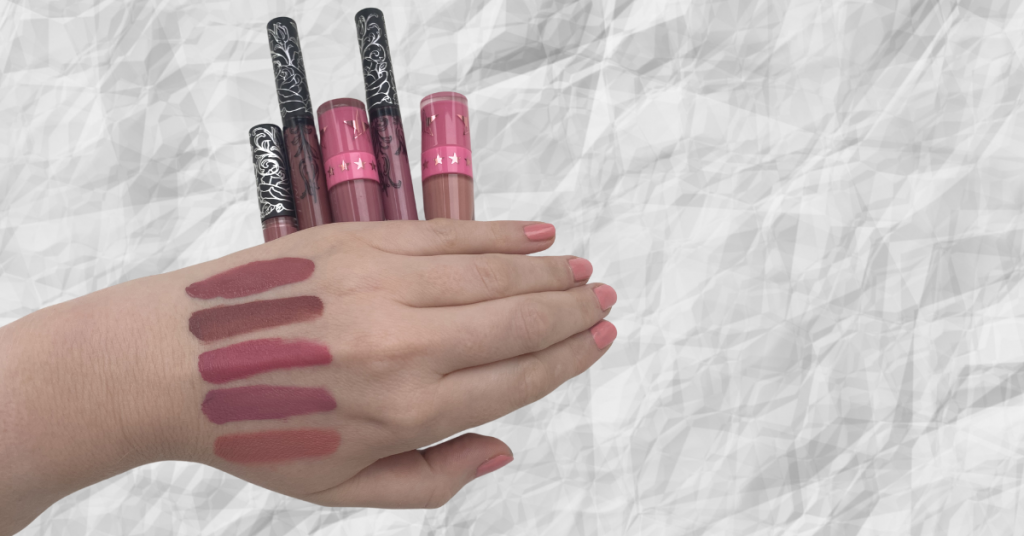
My favorites in pink (from top to bottom on the picture):
- KVD Vegan Beauty Everlasting Liquid Lipstick in Lovecraft
- KVD Vegan Beauty Everlasting Liquid Lipstick in Lolita
- Jeffree Star Cosmetics Velour Liquid Lipstick in Doll Parts
- KVD Vegan Beauty Everlasting Liquid Lipstick in Lovesick
- Jeffree Star Cosmetics Velour Liquid Lipstick in Birthday Suit
- smashbox Always On Liquid Lipstick in Babe Alert
The Finish
Step 15: Setting Spray
It’s a good idea to lock in your makeup look with a setting spray. If you accidentally used too much powder, this can also help restore a nicer texture.
The best bridal setting sprays
- Skin Illustrator Green Marble SeLr Sealer Spray
- Urban Decay All Nighter Make-up Setting Spray
- Urban Decay De-Slick Make-up Setting Spray
Bridal Makeup Pink: Touch-up Kit
All of my brides get a touch-up and emergency kit filled with things that could be necessary. The most important things are:
- Lipstick
- Powder
- Tissues
- Straws
- Q-Tips
- Oil Blotting Papers
- Blister Bandaids
We made it! I hope you liked this tutorial and these tips! In my own wedding look I am probably going to go for a more peachy vibe, so a tutorial on that might follow soon!
I hope you have a great weekend!
Maike Make Up Artist Wien – Your makeup artist in Vienna
